Allowing users with certain email domain(s) to join automatically

Organization admins can add allowed email domains to their organization settings so that anyone with those email domains can automatically join their organization (without explicitly inviting them). To update your organization’s allowed email domains setting, go to the General section of your Organization settings.
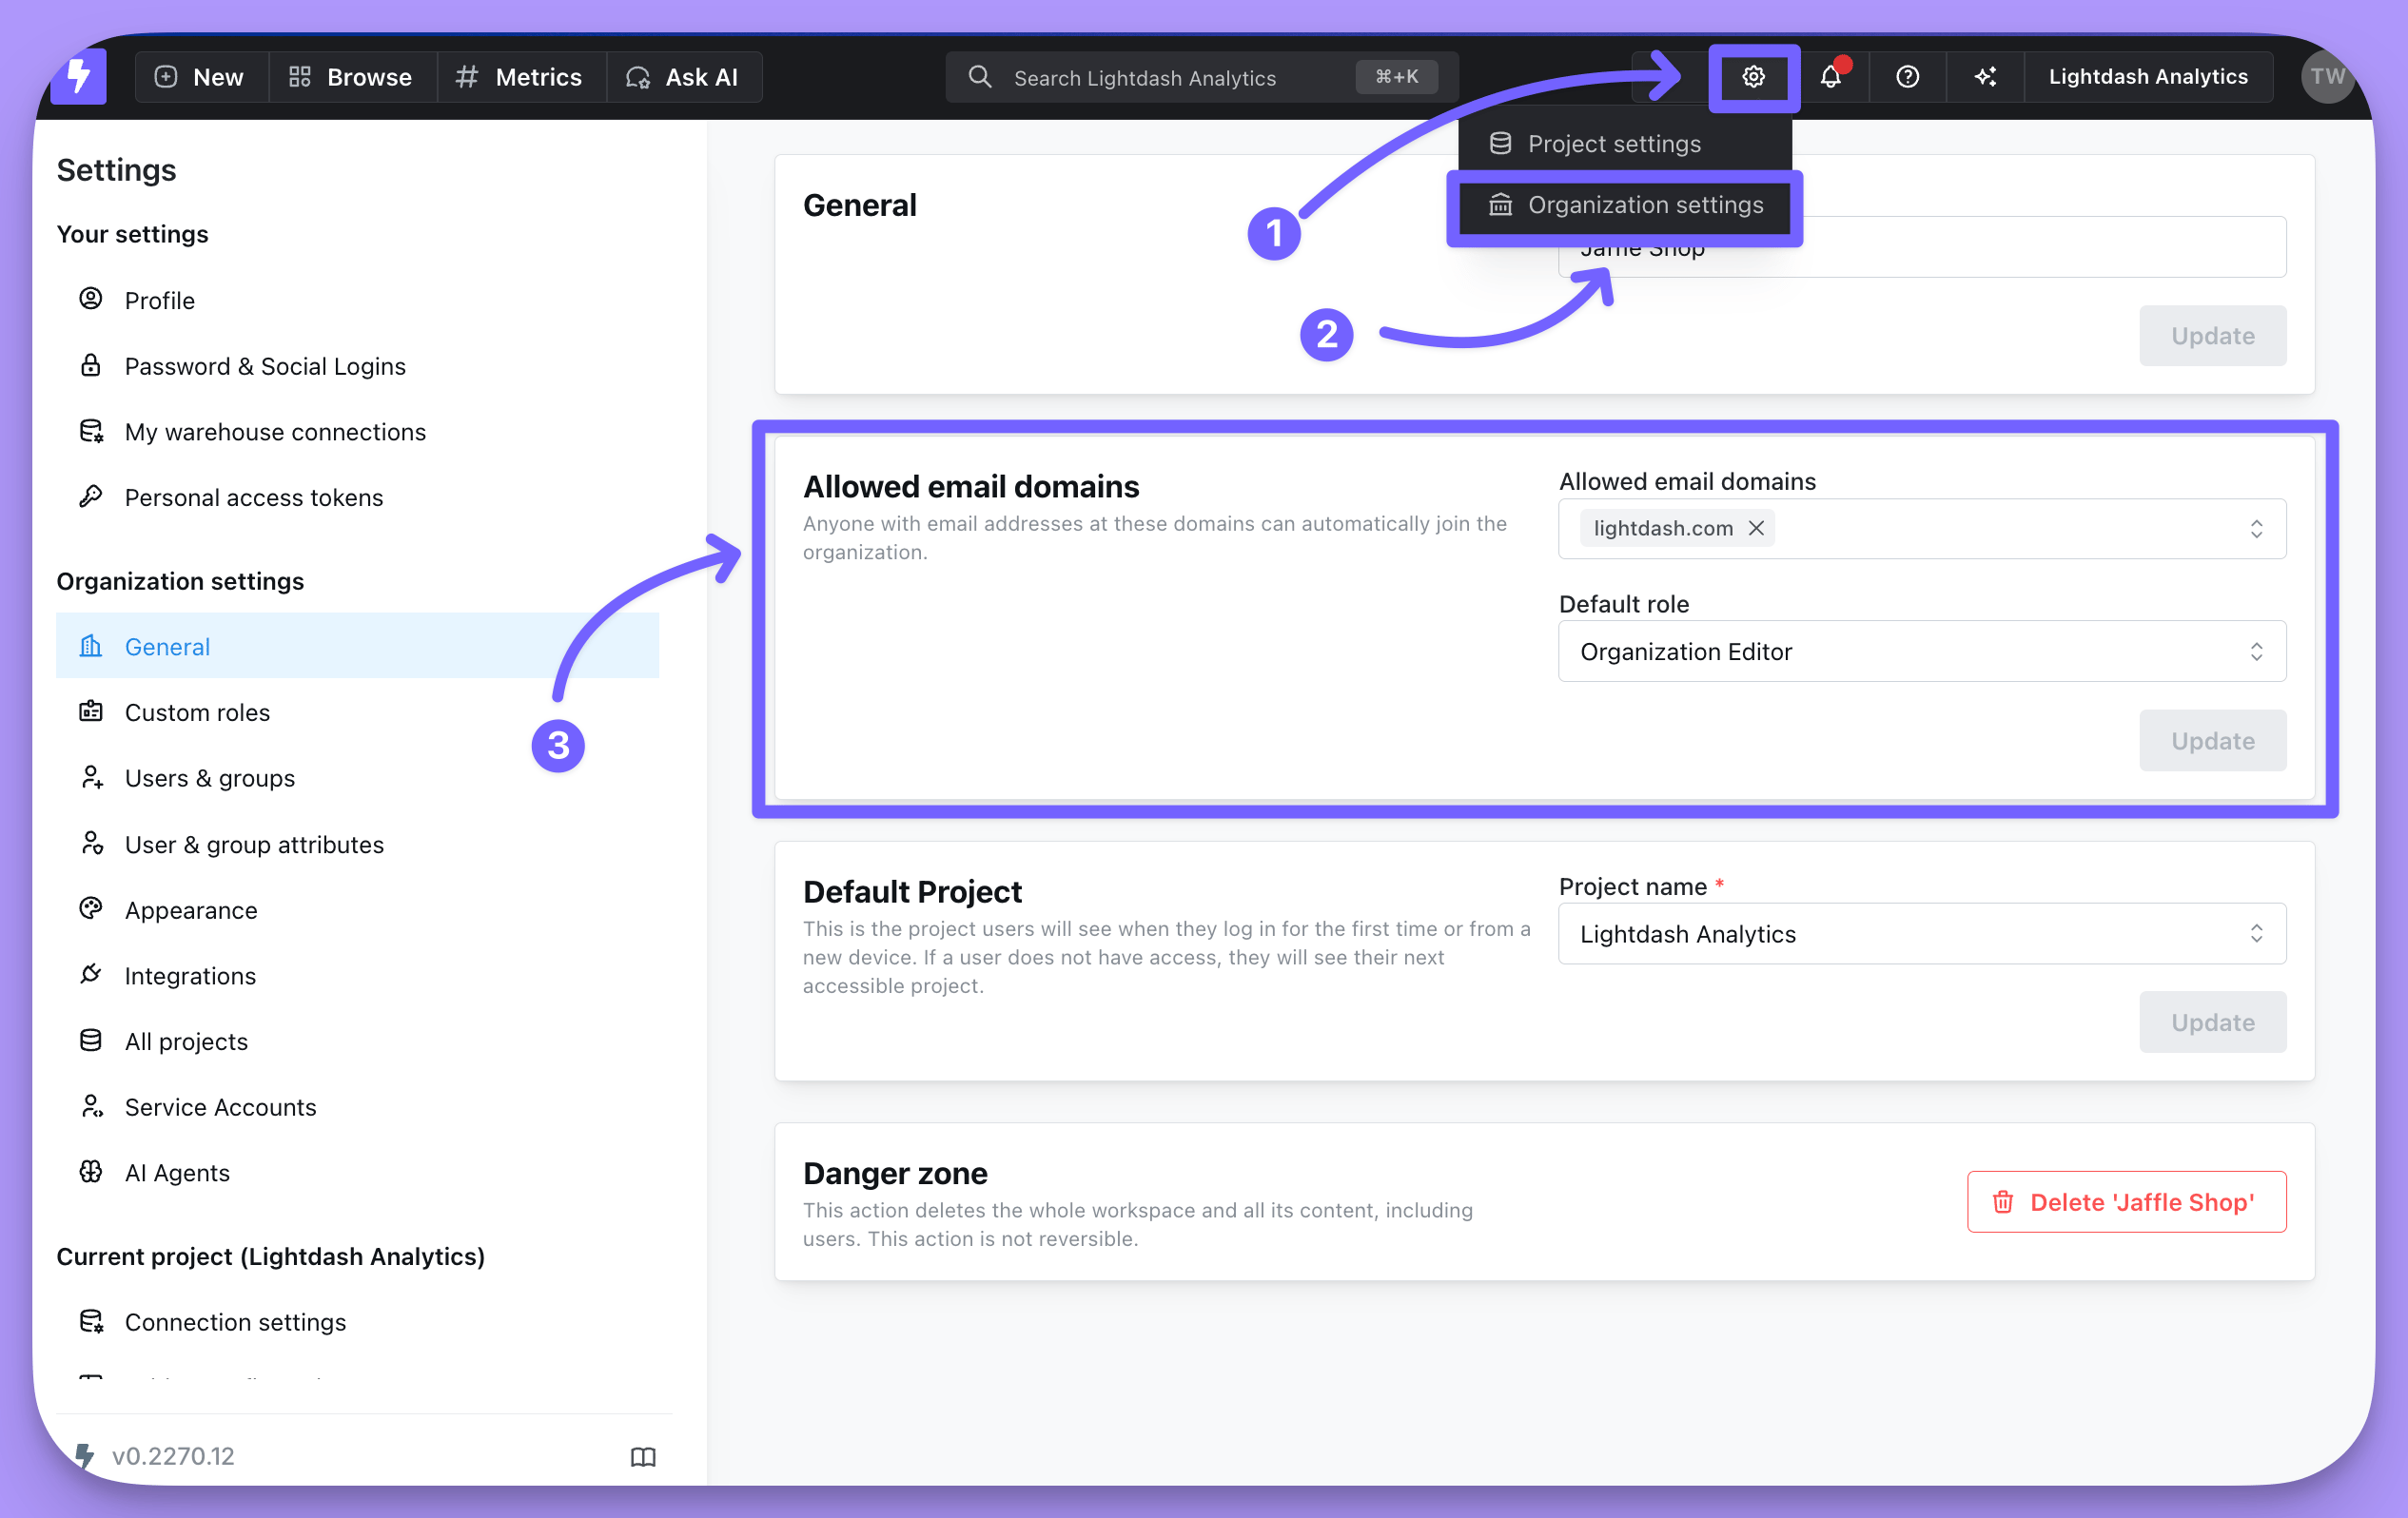
The General page of Organization settings, reached from the gear menu, with the Allowed email domains panel highlighted
In the Allowed email domains panel, enter the email domain(s) you want to be able to automatically join your organization (e.g. here, we’ve added lightdash.com). Generic email domains like gmail.com or hotmail.com are not accepted. You can then select the access that you want these users to have by default. The organization Admin can always update a user’s permissions after they’ve joined!
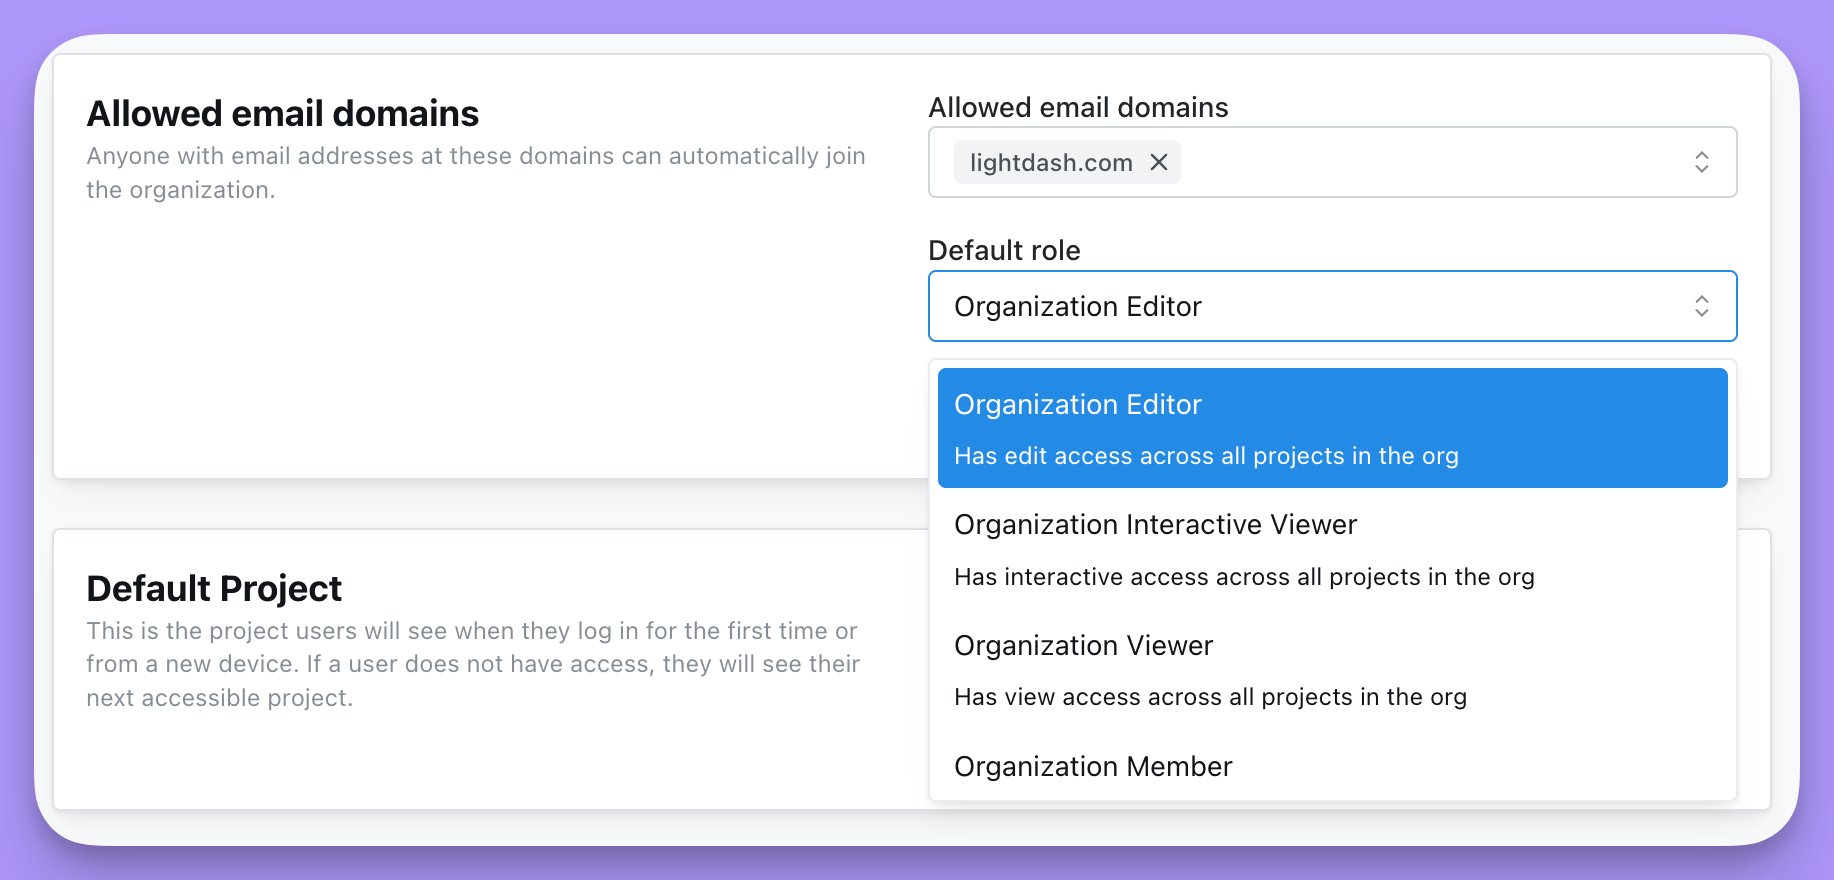
The Allowed email domains panel with lightdash.com added and the Default role dropdown open on Organization Editor
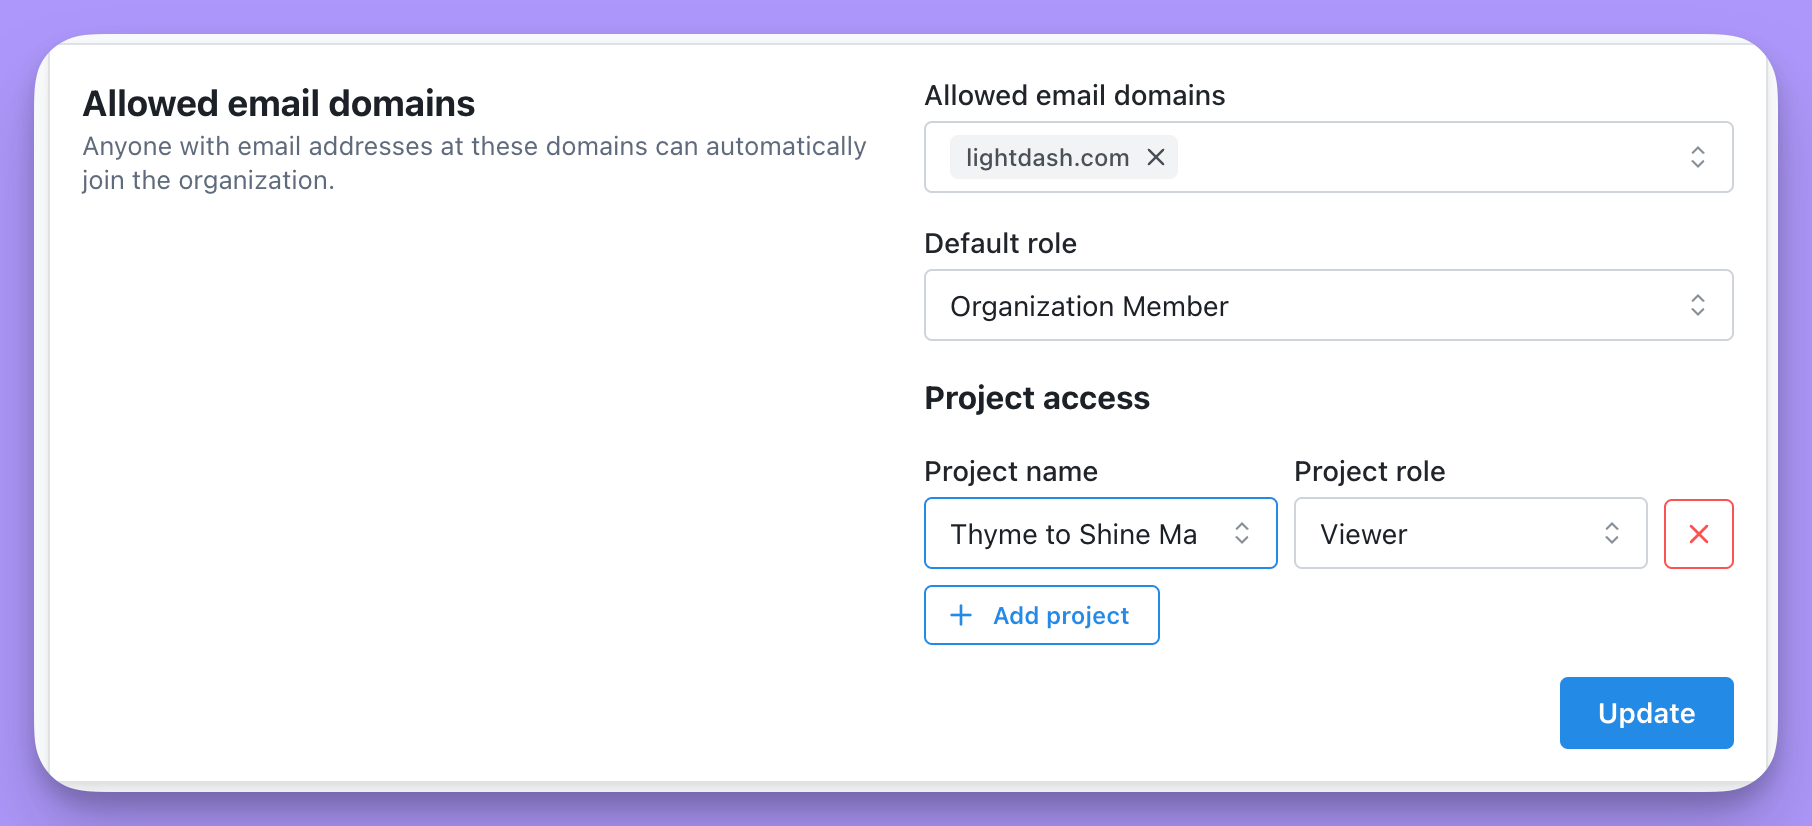
If you want to add default permissions that are different across each project, you can select the organization role of Organization member, then set the project access for each project.
The Allowed email domains panel with the default role set to Organization Member and a Project access row granting Viewer on one project
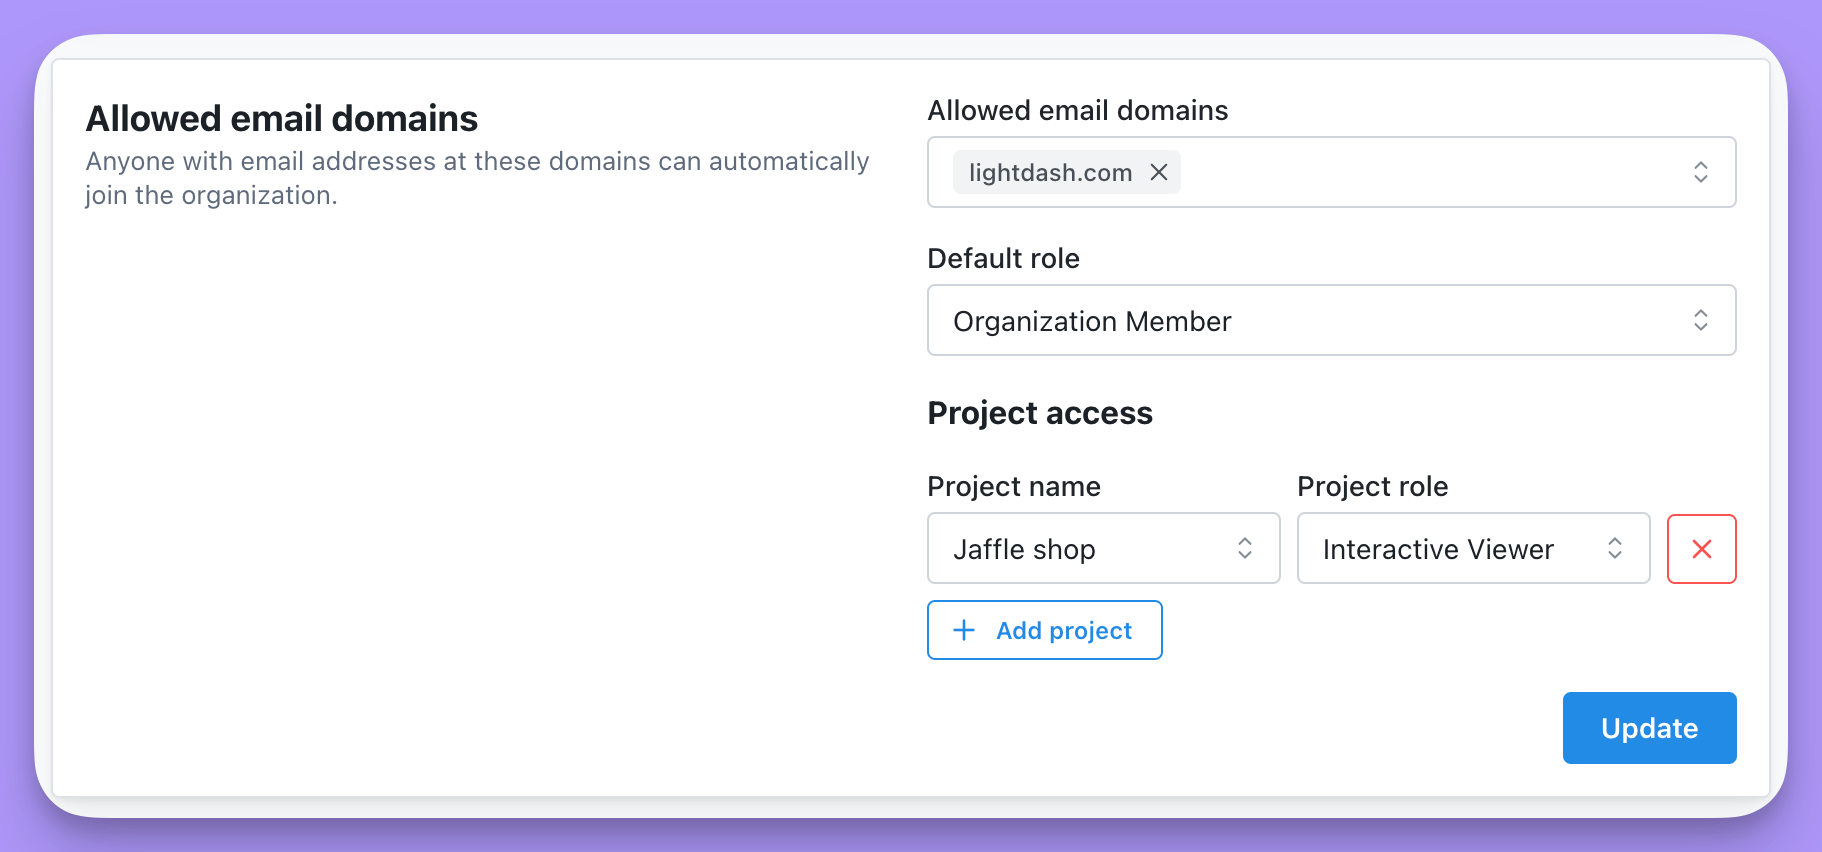
Once you’ve selected the default roles for your allowed email domains, make sure to click Update to save your changes.
The Allowed email domains panel with per-project access configured and the Update button at the bottom right
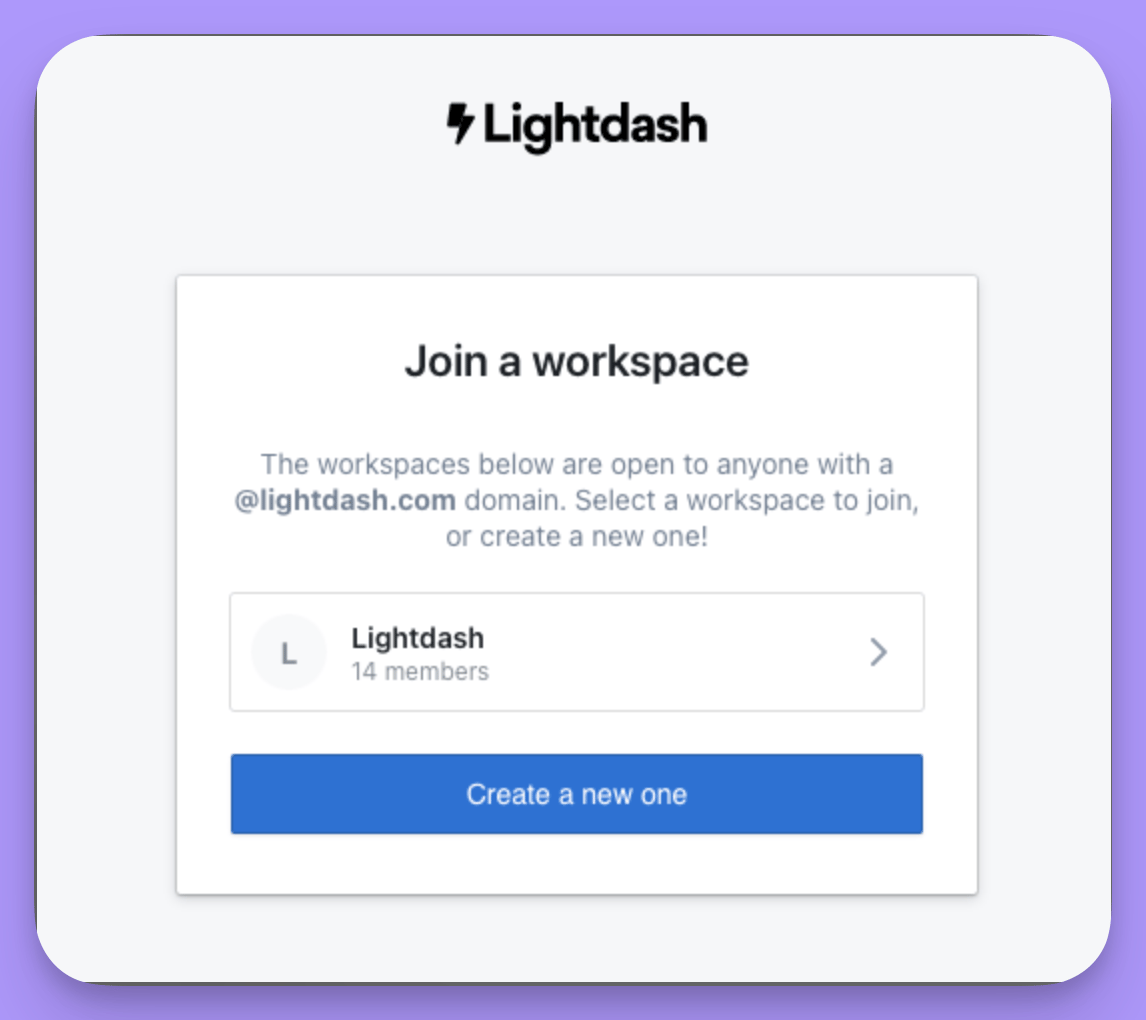
Now, when a user tries to join Lightdash, they will be prompted to join your workspace if they have one of your allowed email domains.
A Join a workspace screen offering the Lightdash workspace, open to anyone with a lightdash.com address, or Create a new one

Setting a Default Project

In the Organization settings you can set a default project. This is the project users will see when they log in for the first time or from a new device. If a user does not have access, they will see their next accessible project.

Inviting new users individually

To invite your teammates individually, click on Organization settings —> Users & groups —> Add user.
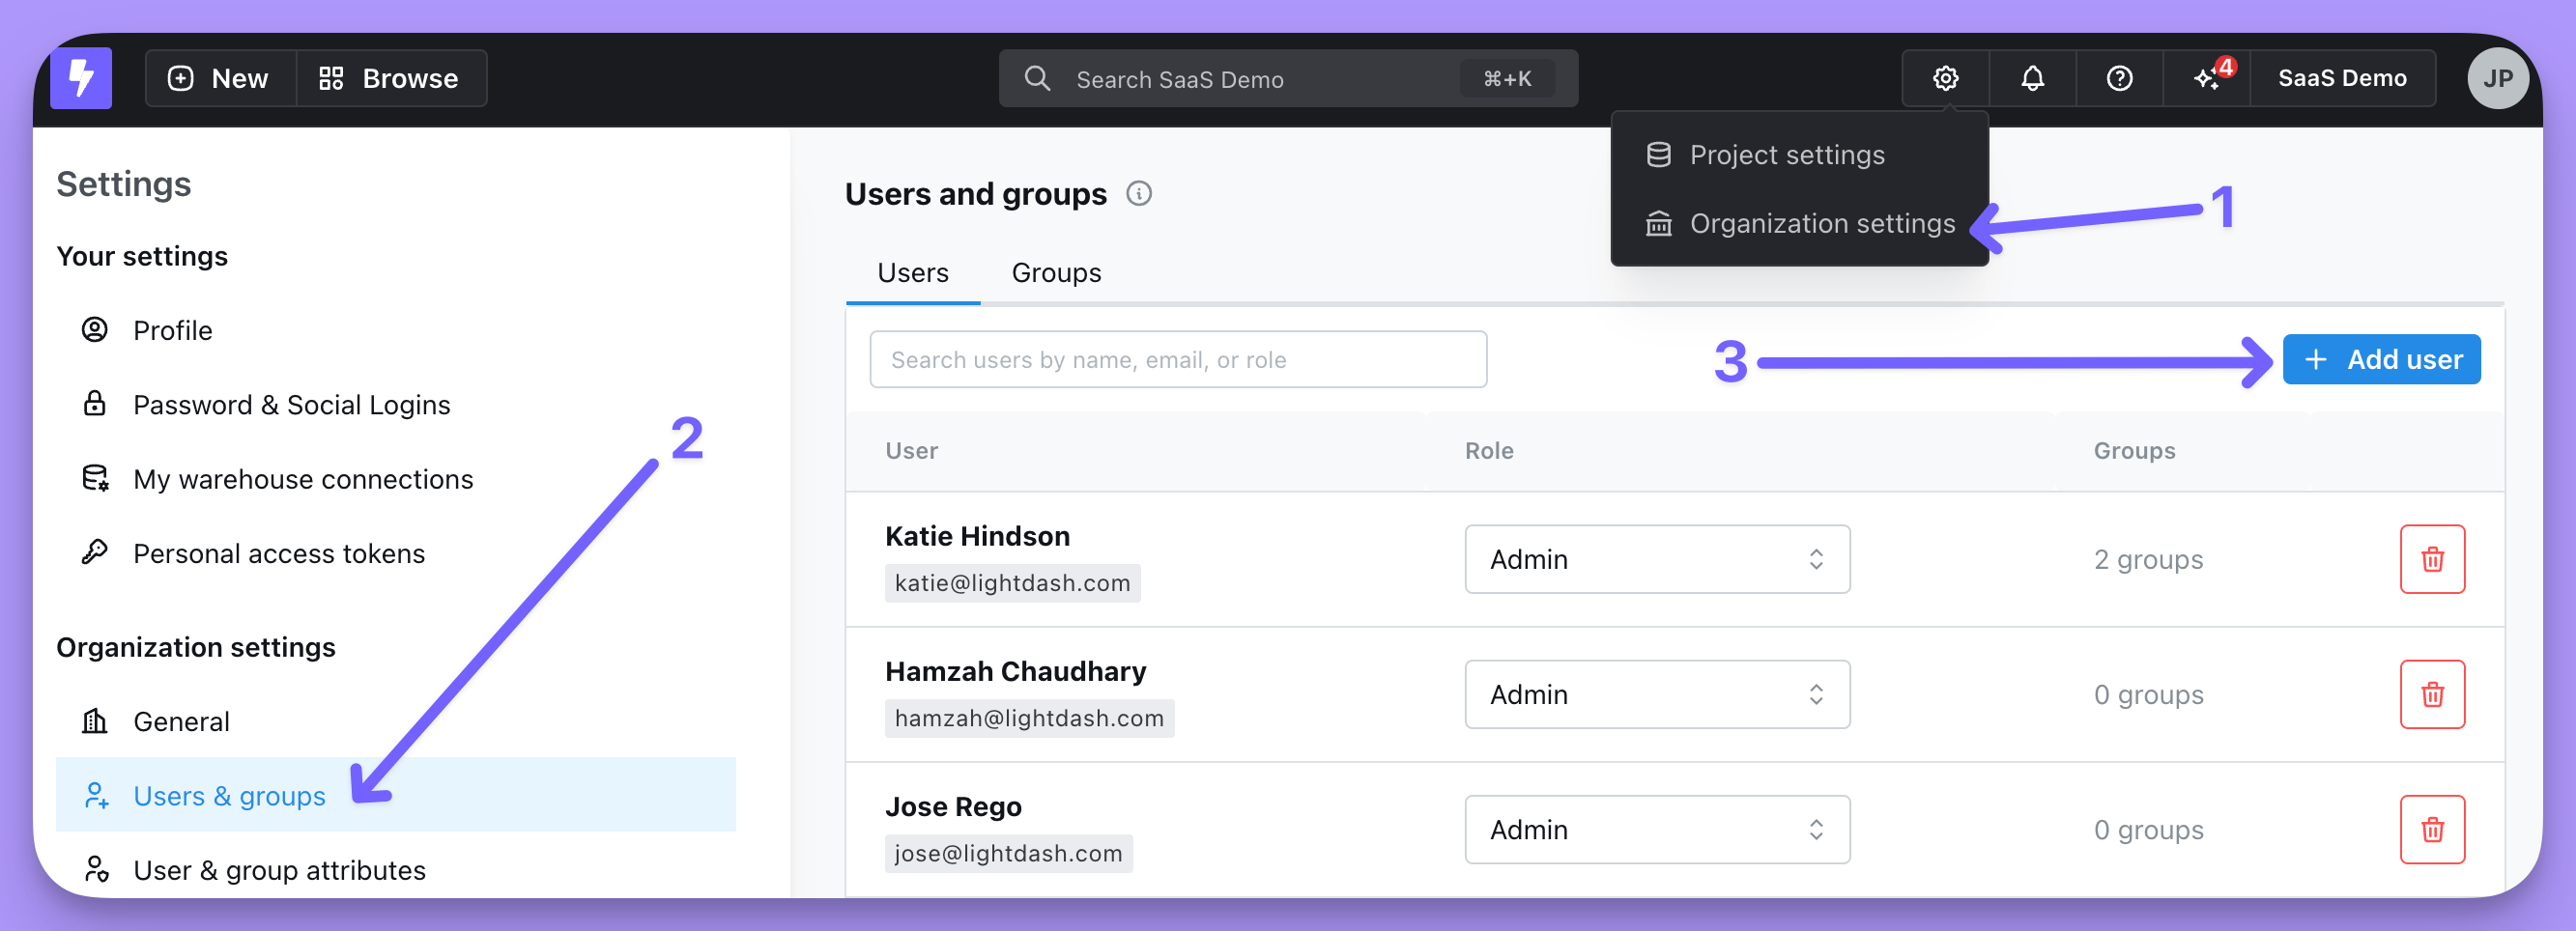
The Users and groups page in Organization settings, with the Add user button highlighted above the list of users and their roles
You then need to input the email address of the user you want to invite and select the role you want to assign them. Read more about user roles and permissions in Lightdash here. Once you hit Send invite, we’ll send an email to the new user with their invite link.
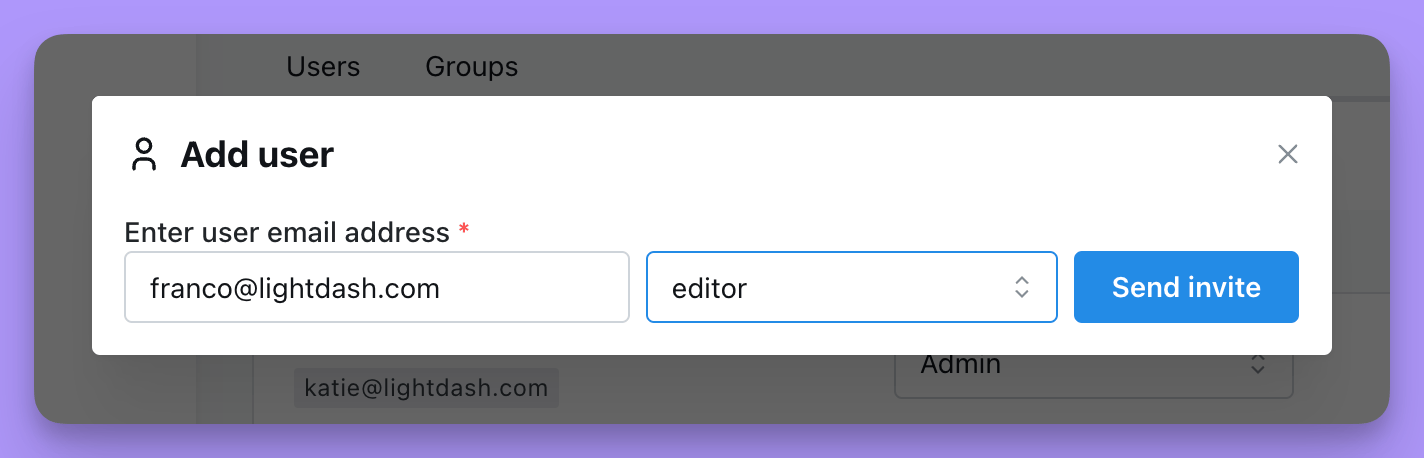
The Add user dialog with an email address entered, the role set to editor, and a Send invite button
Once you’re done inviting users, you can head back to the list of users in the Users & groups tab, scroll to the bottom and see all of the pending invitations for your project. You can also re-generate an invite link if you need to!
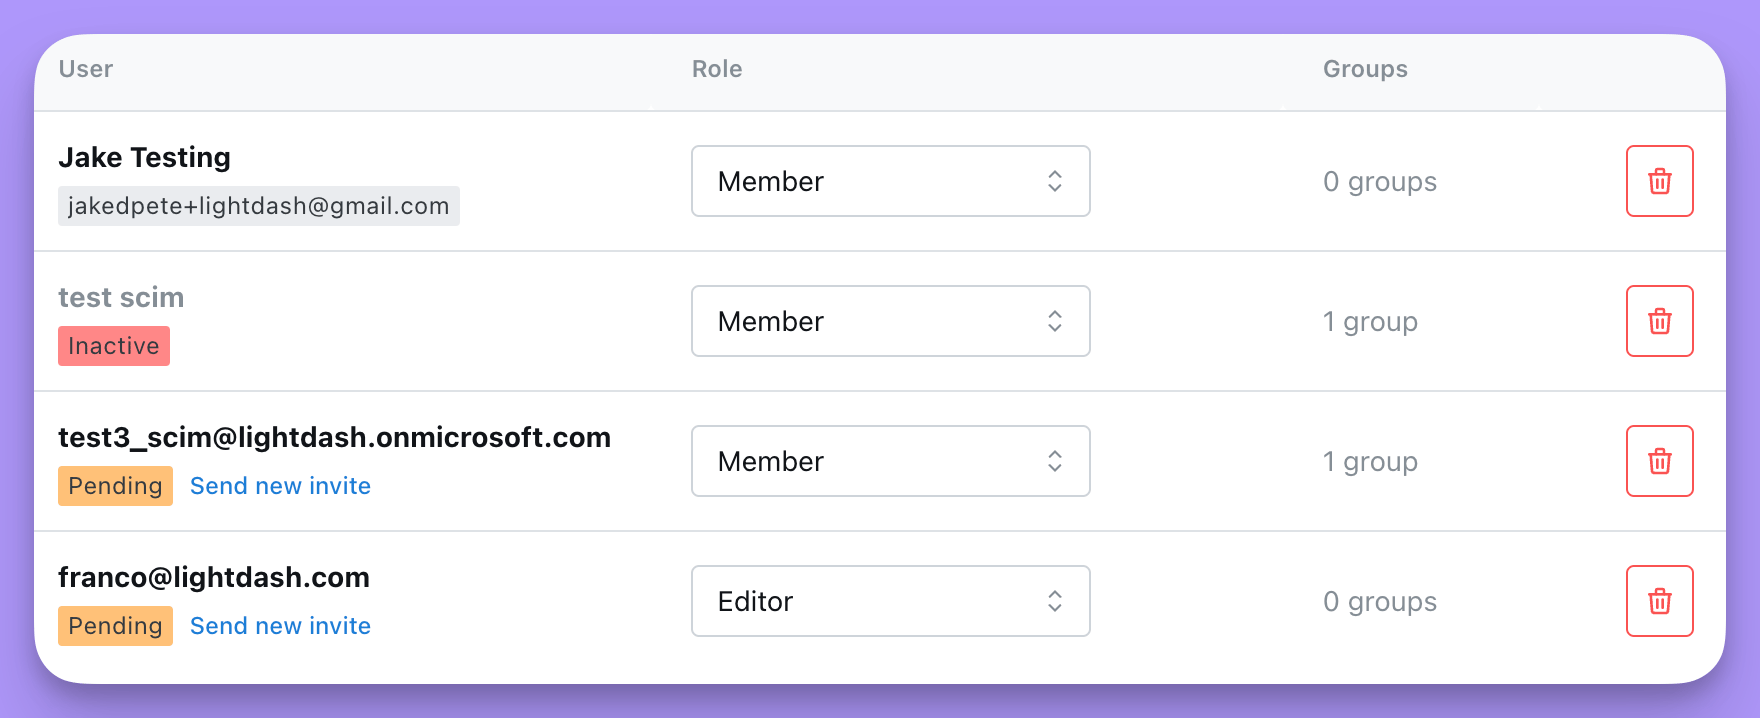
A user list where two rows carry a Pending badge and a Send new invite link beside the invited email address