1
Create your first agent
Set up a new AI agent in your Lightdash project, follow the guide
2
Configure your agent
Use tags to control which data the agent can access, follow the guide.
3
Connect to Slack
Enable team collaboration through Slack, follow the guide
Creating your first AI agent
Go to Ask AI
This will be your entry point to working with the AI agent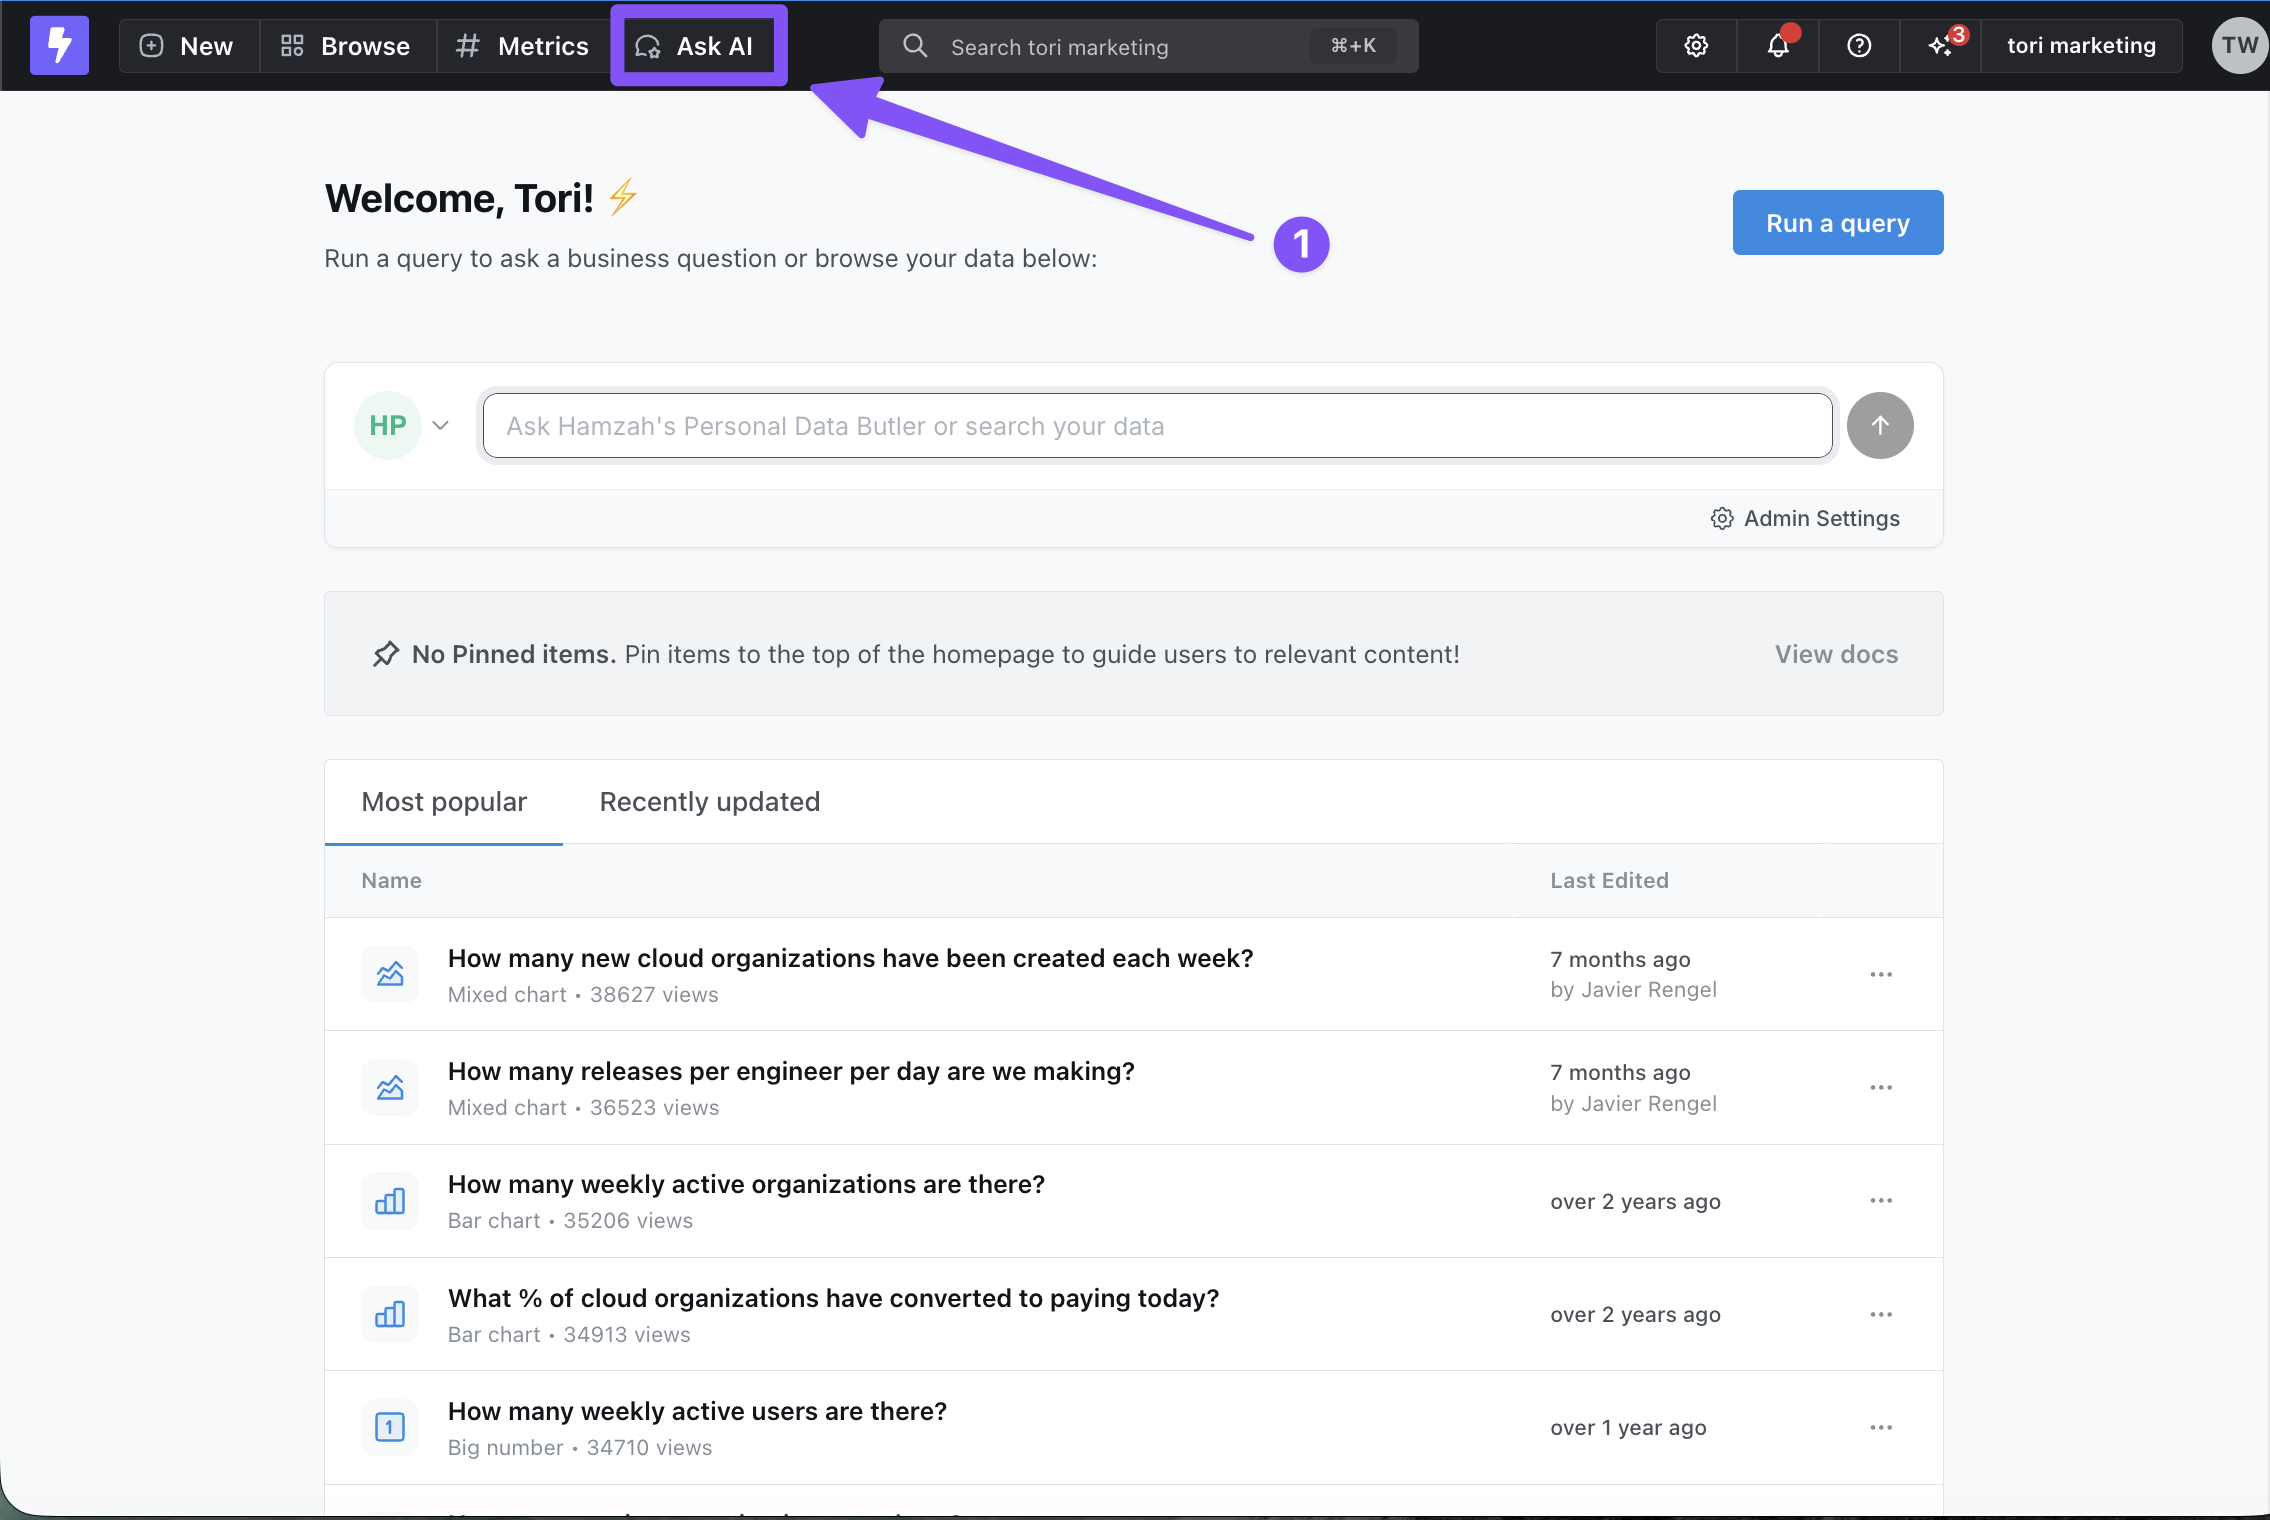
Create a new agent
Go to the agent dropdown and click Create new agent at the bottom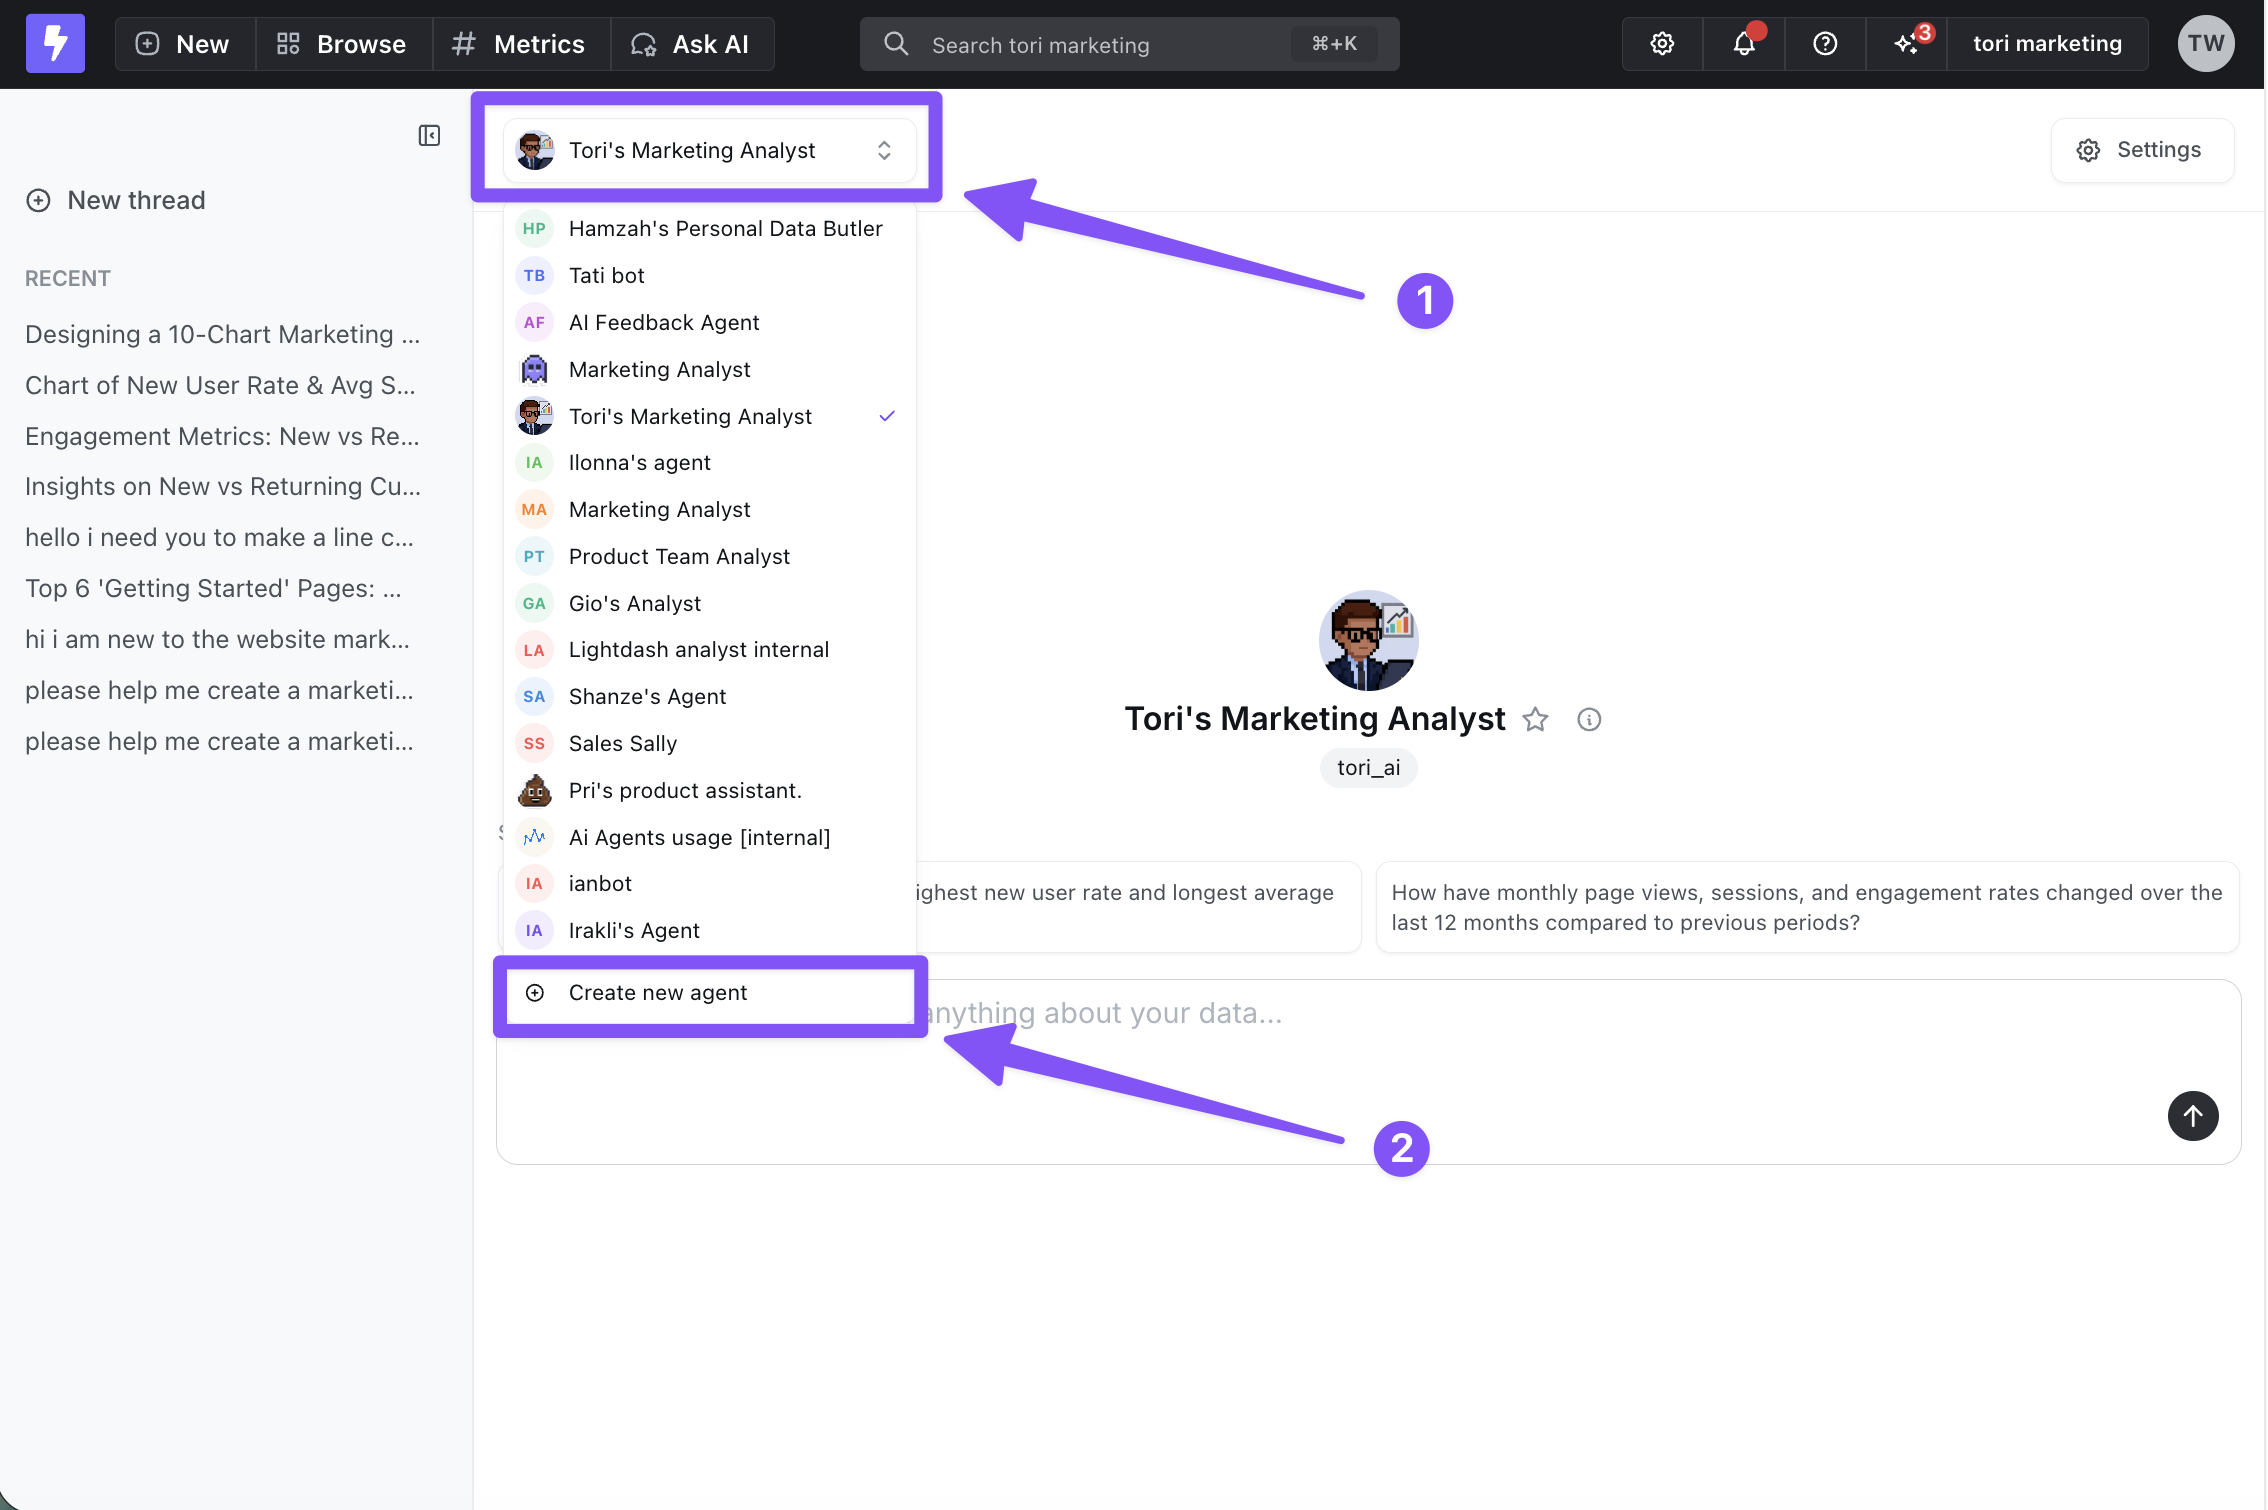
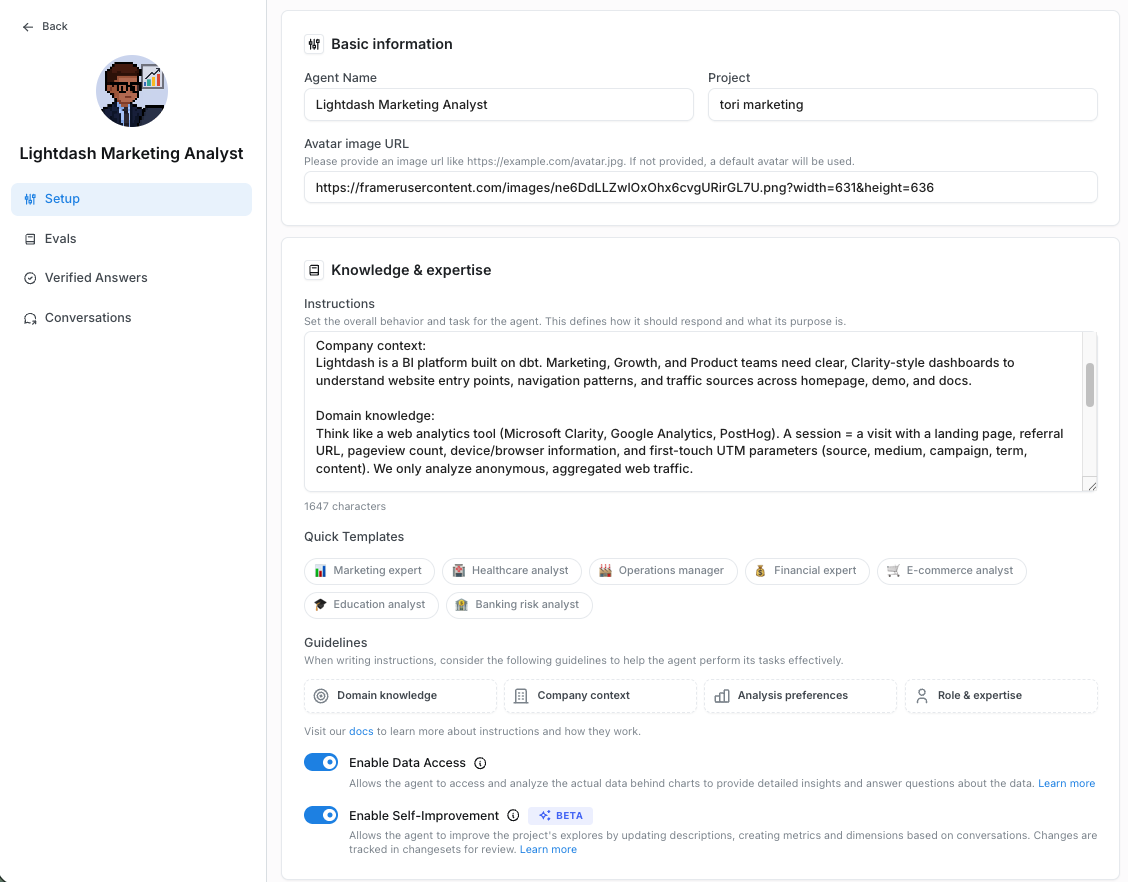
Configure your agent
Name and image
Give your agent a memorable name and visual identityInstructions
Provide context to guide your agent’s reasoning and ensure responses match your expectations. Your instructions can include any of the following components. Each one helps the agent understand your data, your business, and how you want insights delivered:- Domain knowledge - Describe the industry or subject area the AI should think within. Include relevant terminology, methodologies, frameworks, and technical concepts.
- Company context - Explain the business background behind your analysis. Add details about your goals, product, target audience, strategy, or any constraints that influence how insights should be generated.
- Analysis preferences - Clarify how you want the AI to approach analysis. Specify preferred metrics, dimensions, chart types, visualization styles, and reporting formats so results match your expectations.
- Role & expertise - Tell the AI what role it should adopt (e.g., “Senior Marketing Analyst”). Include the communication style, depth of explanation, and level of decision-making authority you expect.
Enable Data Access (optional)
Enable data access to allow your agent to analyze actual query results and provide insights based on the data. When disabled, agents work with metadata only. Learn how to enable data accessUser and Group Access (optional)
Control which users and groups can access your agent through the agent settings. For detailed guidance on how to configure data access control, see hereTags (optional)
Use tags in the Lightdash metadata to control which metrics and dimensions the agent can access. Tags help you restrict your agent to a specific slice of your semantic layer.- Tag your dbt model dimensions and metrics with the tags you want - your agent will only have access to those dimensions or metrics that have matching tags.
View code examples
View code examples
- Add the corresponding tags to your agent settings under the Tags field. This tells the agent which tagged dimensions and metrics it should access.
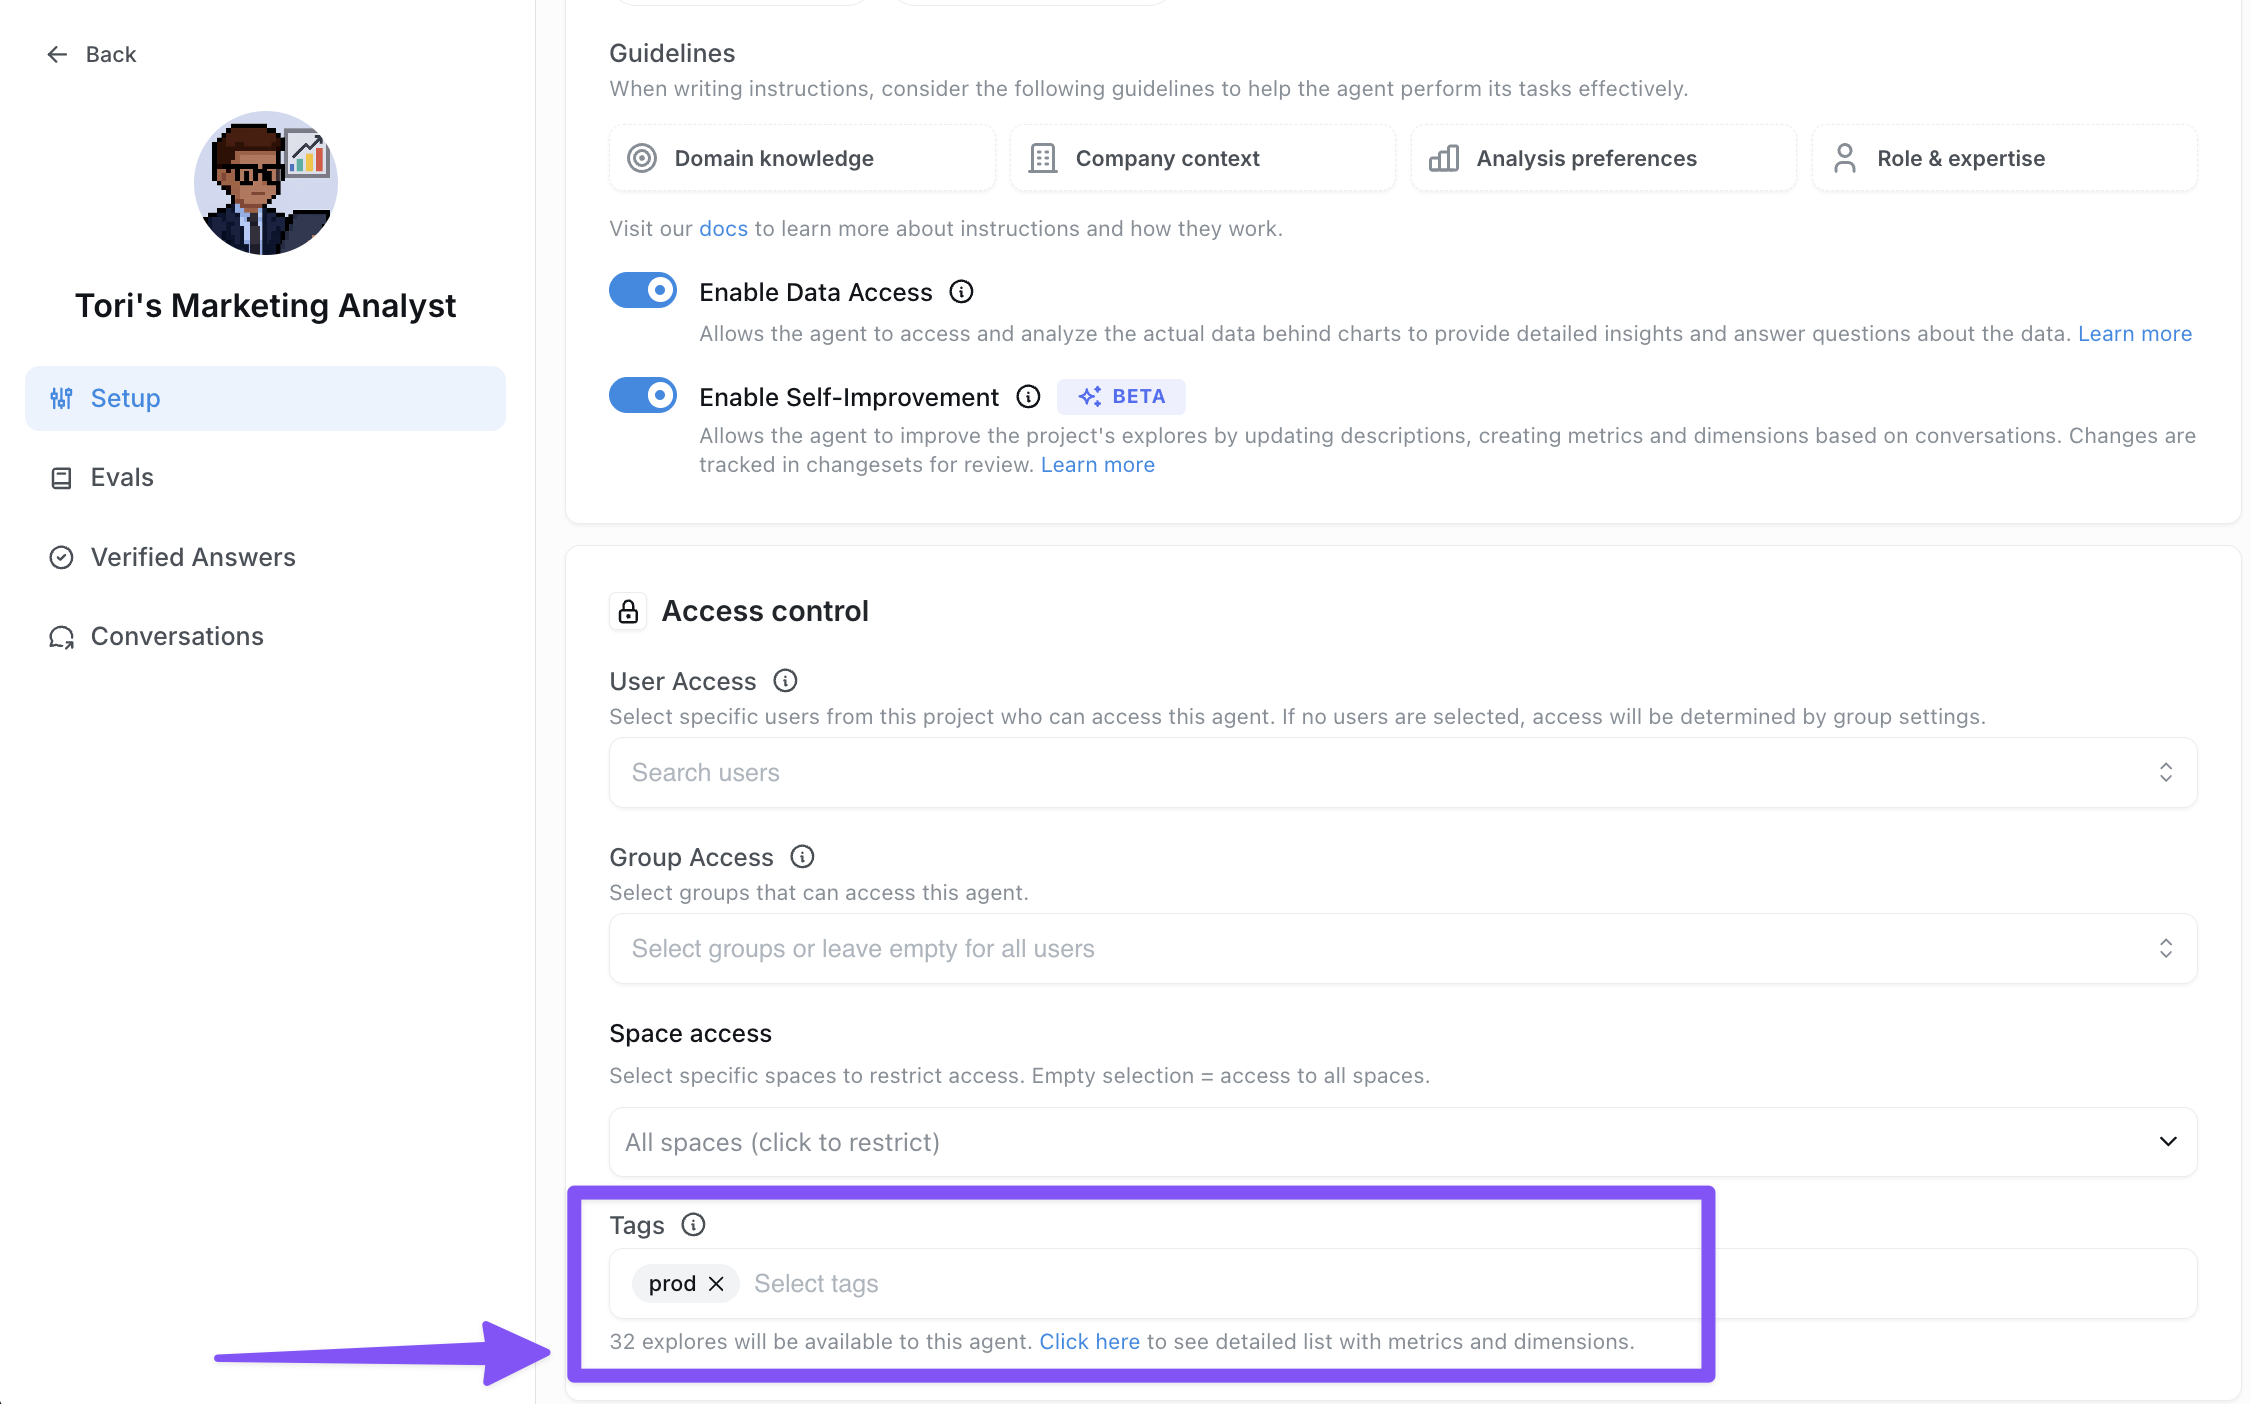
- For more technical users who want to configure tagging rules in more detail - including how tags interact with permissions and schema visibility - see the Data access control section.
Enable Self-Improvement (optional, Beta)
Allow your agent to propose changes to your semantic layer, including updating descriptions and creating new metrics. Changes are tracked in changesets for review. Read more on self-improvement (beta) feature.Slack Integration
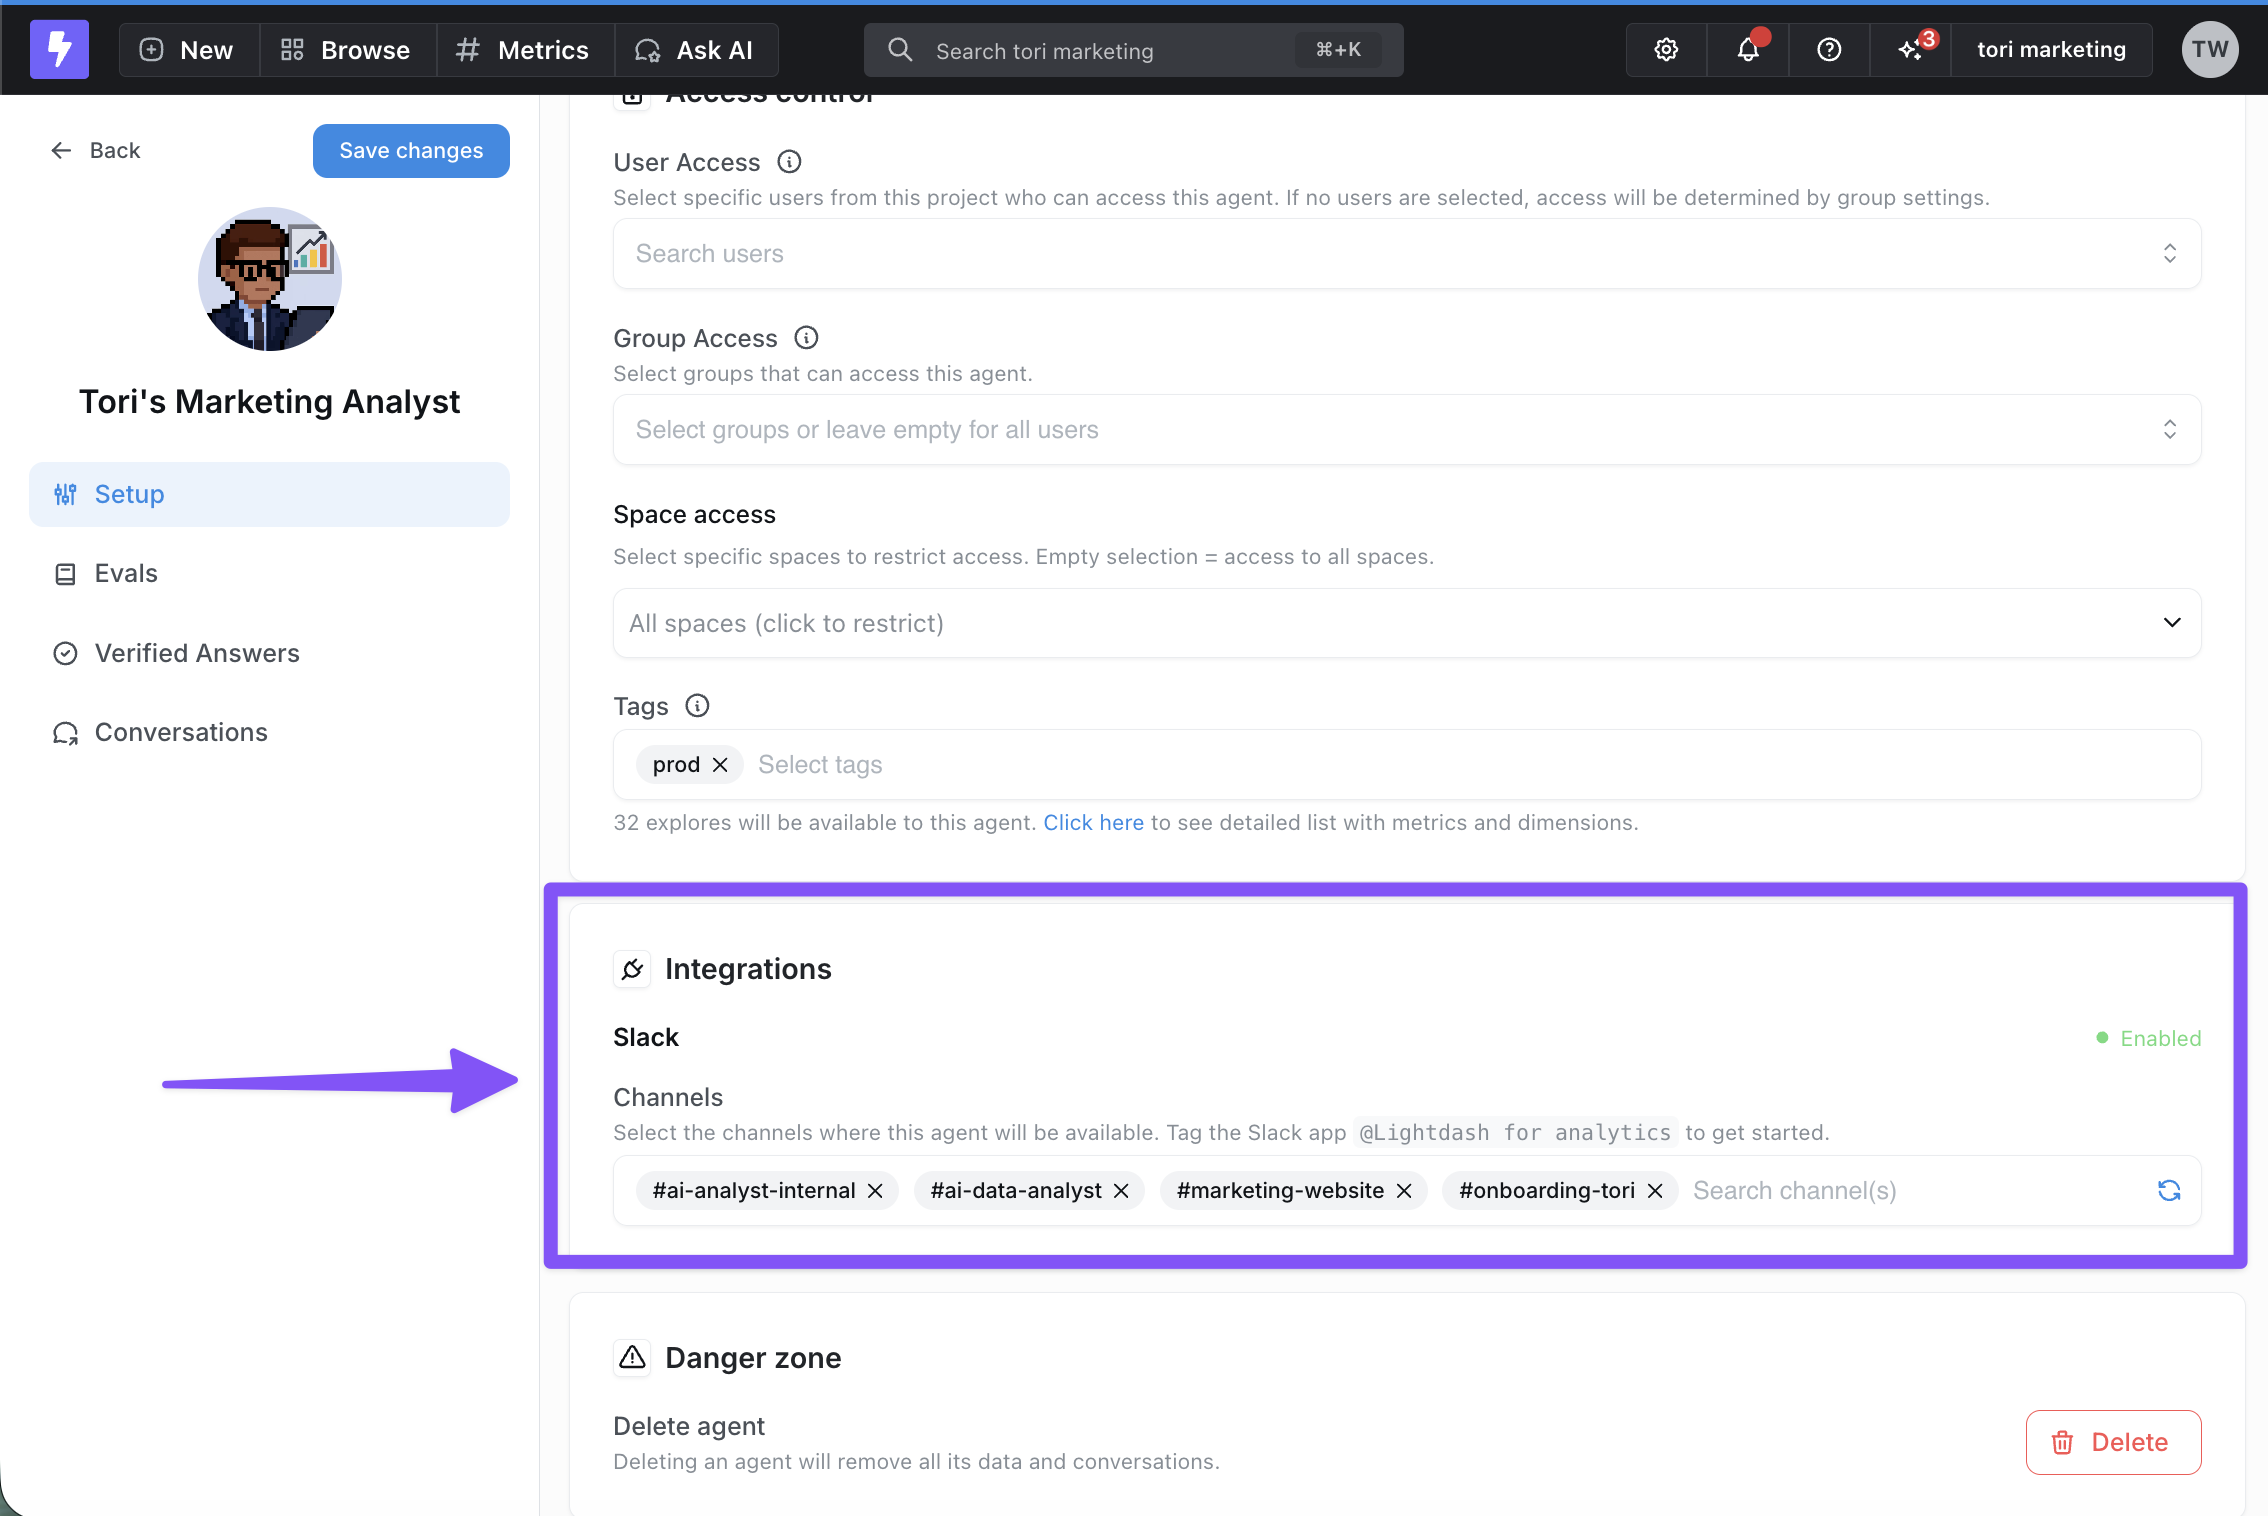
Connect your agent to Slack channels so users can interact directly from Slack. Check out all the cool ways to integrate your agent into slack here- Add Slack to your organization in organization settings. An admin needs to complete this step. See the how-to guide.
- Add the desired slack channel to your agent integration settings.
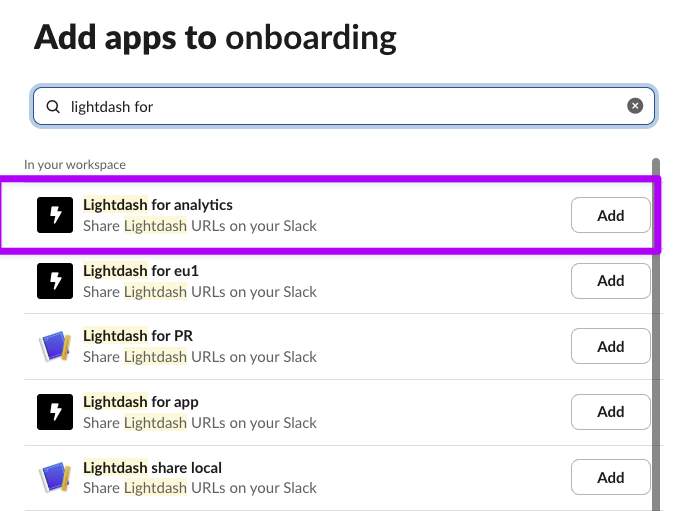
- Add the
Lightdash for analyticsapp to your desired slack channel by going to #channel —> Edit settings —> Integrations:
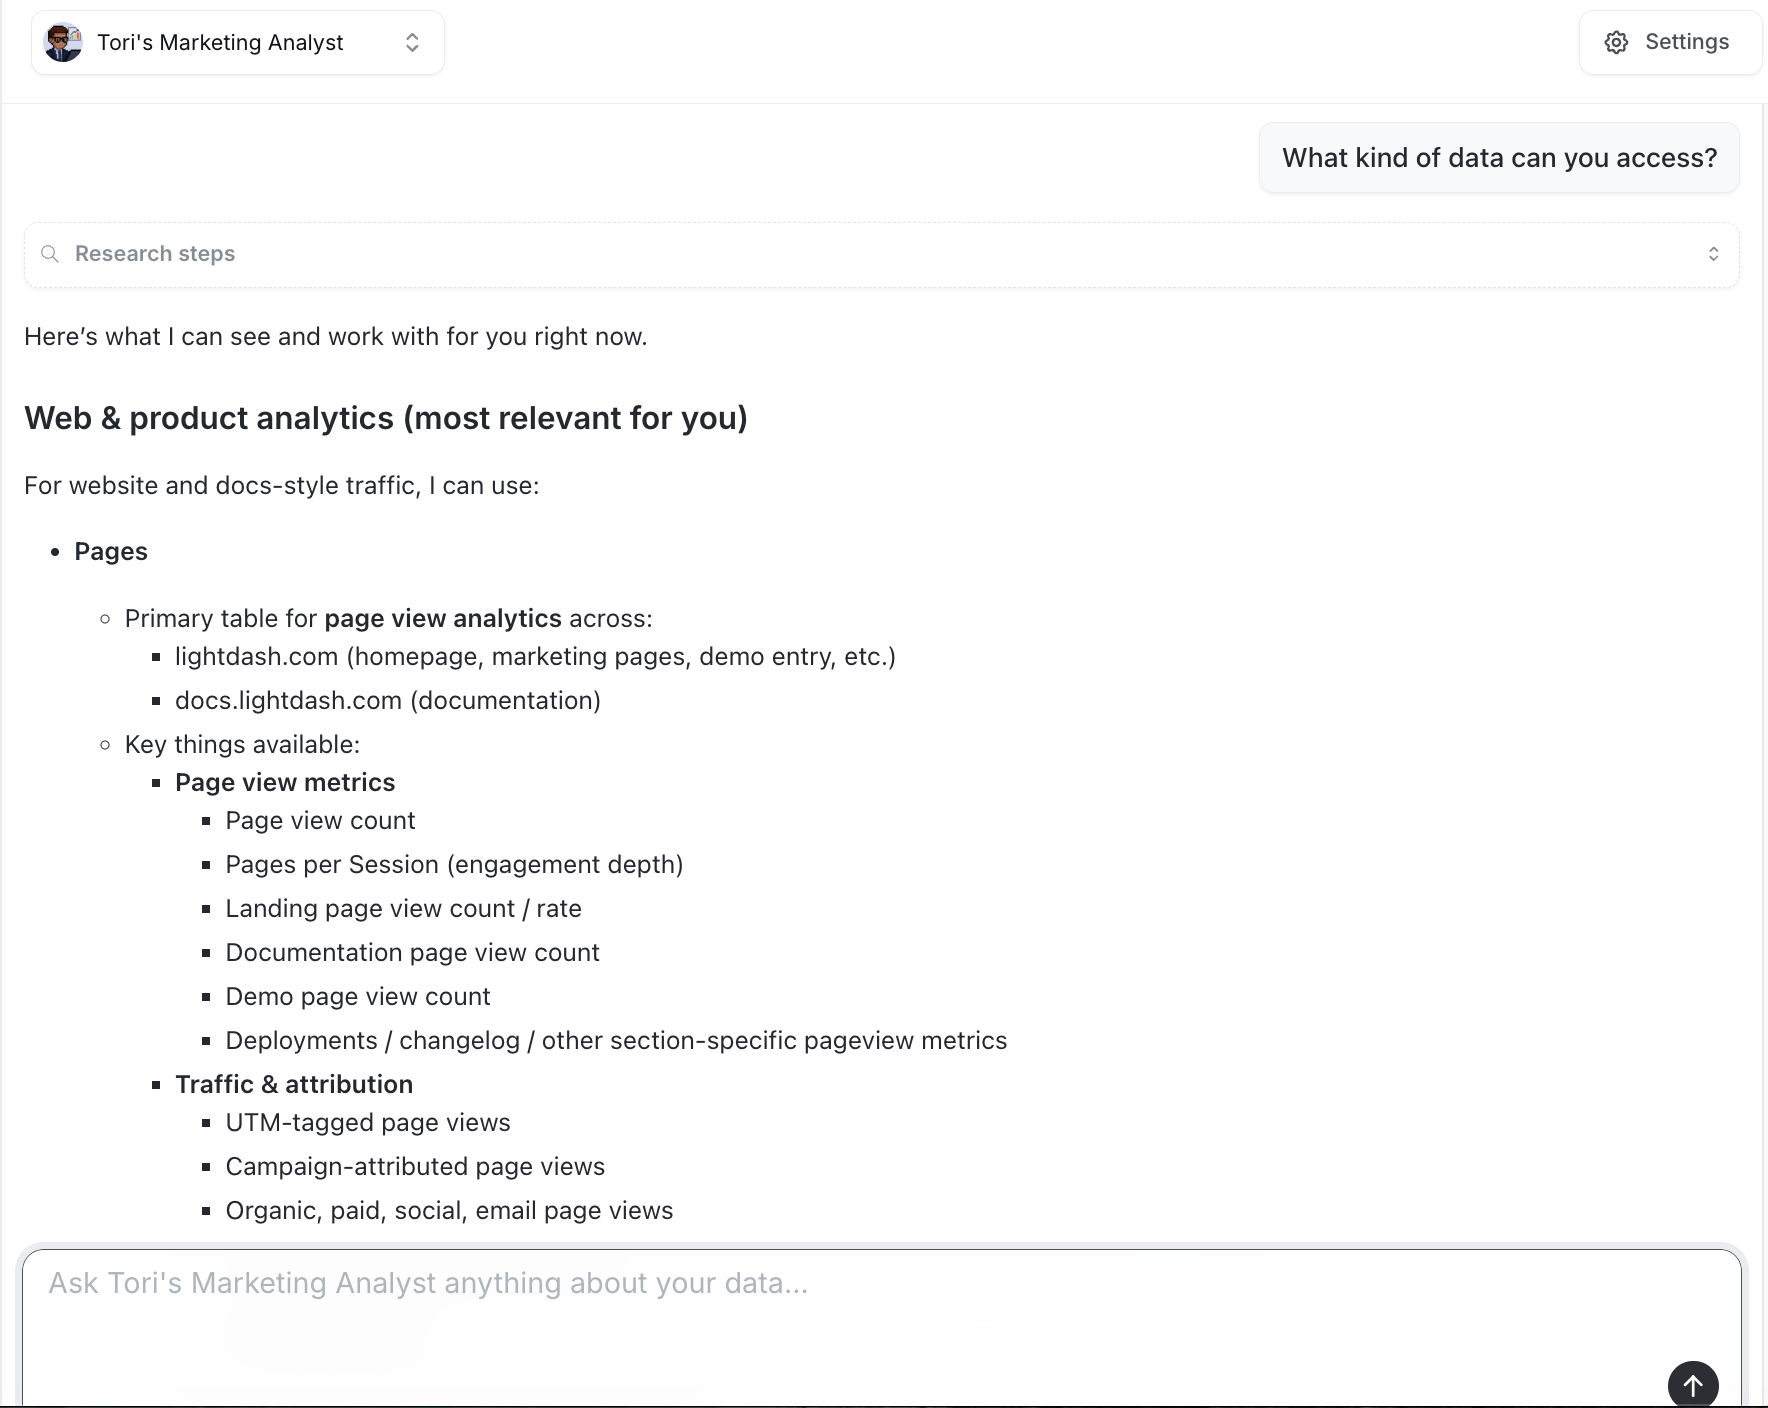
- Now you can interact with your AI agent in slack just as you would in the Lightdash UI. Start asking questions like “What kind of data can you access?” or “Show me total order amount over time”.

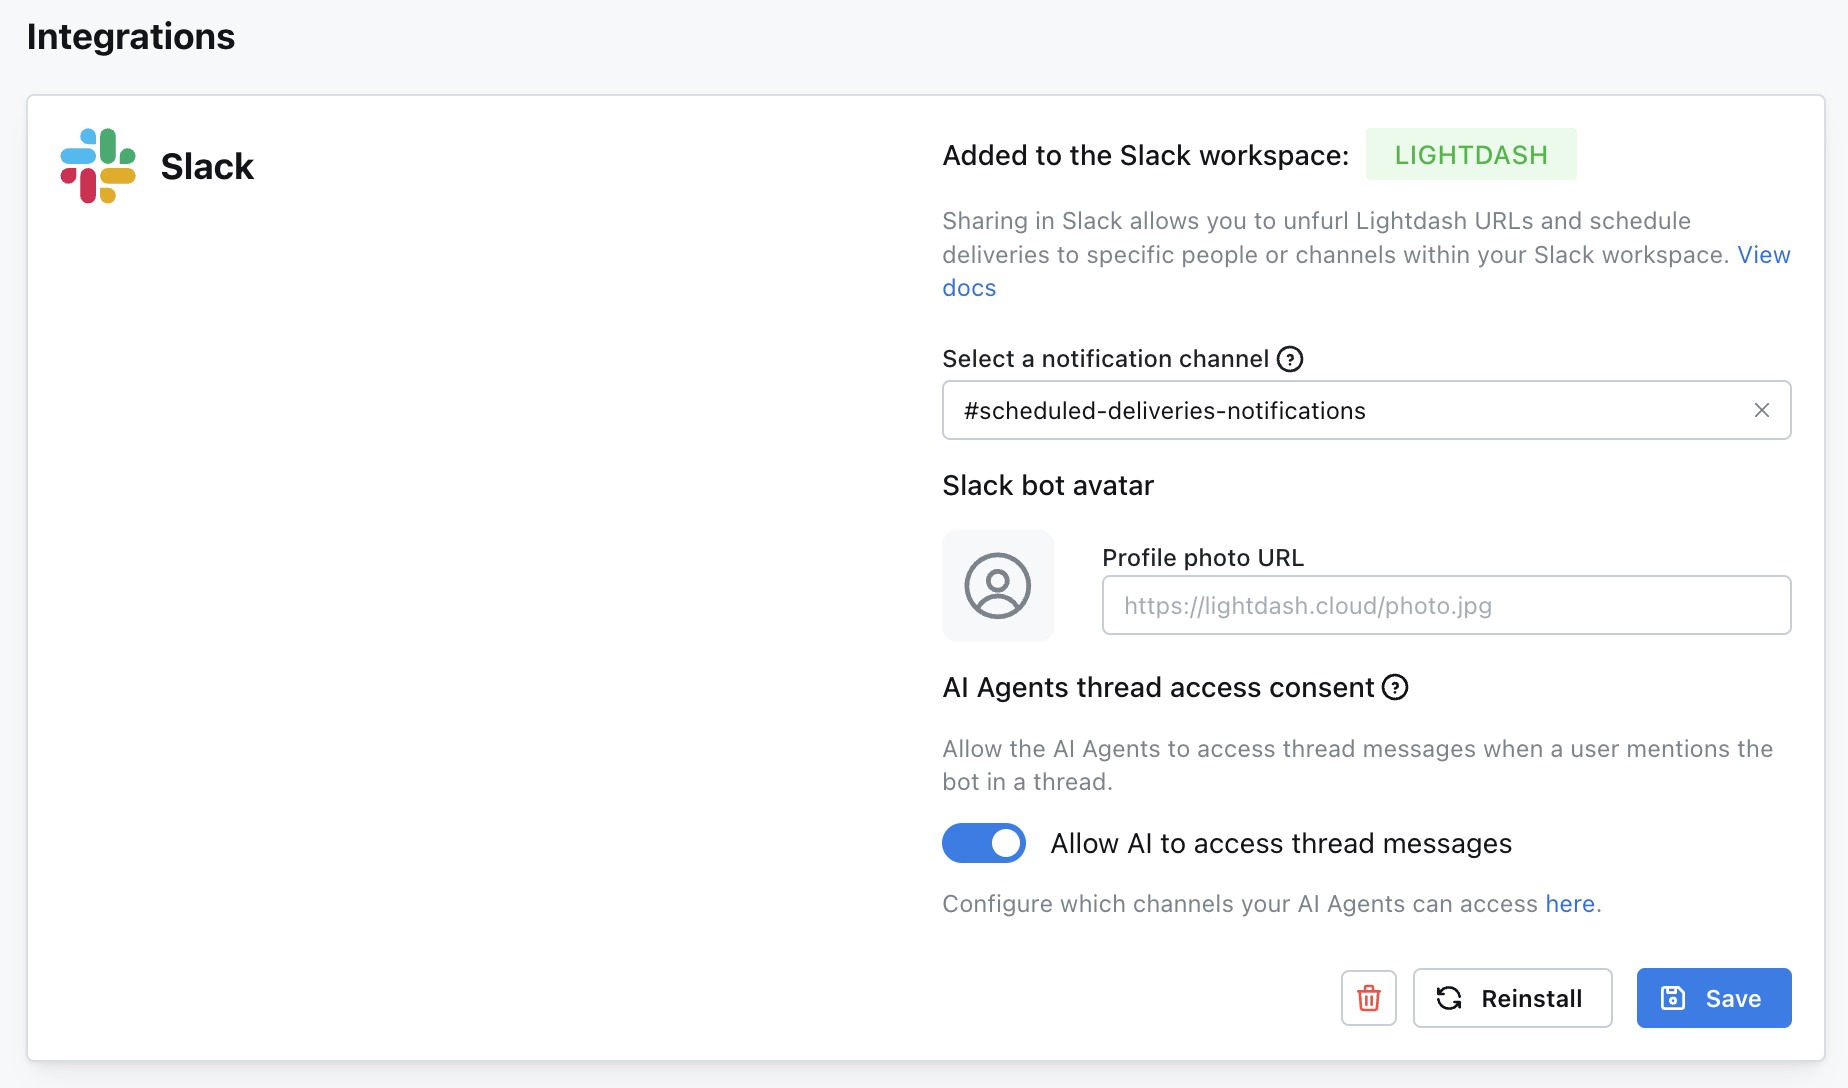
- You can also summon the bot on a thread to continue the conversation. In order for the bot to be able to respond, you need to enable this context sharing in your Lightdash Integrations settings.
Once you’re set up - whether in the UI or in Slack - you can start asking questions immediately! Try asking “What kind of data can you access?” to get started:
